How to Use the Aarke Carbonator 3

This guide aims to provide an in-depth overview of the Aarke Carbonator 3, highlighting its key features and functionality. (You can read our in-depth review of the Aarke Carbonator 3 here, and our comparison of the Aarke Carbonator 3 versus the Pro).
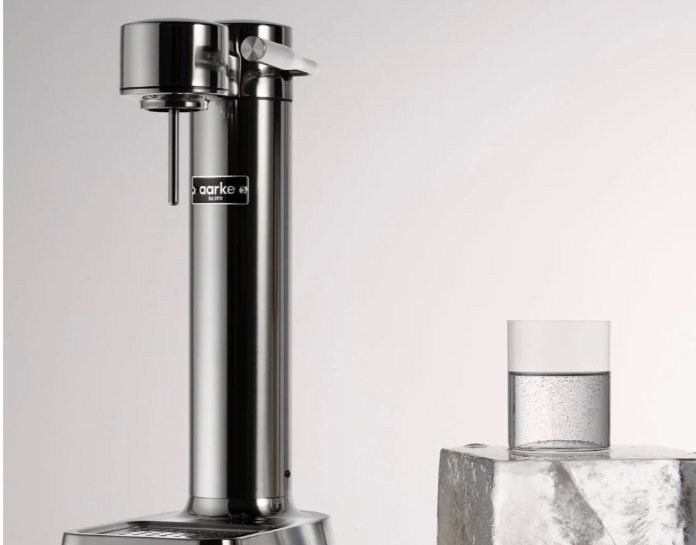
Designed with a sleek stainless steel body, the Aarke Carbonator 3 is not just a kitchen appliance, but a statement piece. Its basic functionality is easy to grasp, making it a user-friendly addition to any home.
Let’s take a closer look at how to use this innovative machine in more detail.
Understanding the Aarke Carbonator 3
The Aarke Carbonator 3 is a sparkling water maker that has taken the market by storm. This sleek and stylish device is designed to turn ordinary tap water into sparkling water in just a few seconds.
Crafted from high-quality stainless steel, the Aarke Carbonator 3 is not only aesthetically pleasing but also incredibly durable. It's a testament to the brand's commitment to quality and functionality.
The basic functionality of the Aarke Carbonator 3 is simple and straightforward. With just a push of a lever, you can carbonate your water to your desired level.
Key Product Components
- The Aarke Carbonator 3 itself, a sleek and stylish sparkling water maker, available in various finishes such as shiny stainless steel, matte black, white, and sand.
- The Aarke PET Water Bottle, specifically designed for use with the Carbonator 3, ensuring longevity and optimal performance.
- The Brass Soda Adapter, a key component that allows for the connection of the Carbonator 3 to a CO2 tank.
- The Quick Connect Hose, which facilitates the transfer of CO2 from the tank to the Carbonator 3.
- The 5 Pound CO2 Tank, a cost-effective and environmentally friendly alternative to traditional SodaStream canisters.
- Flavour Drops or Drink Mixers, added after carbonation, to enhance the taste of your sparkling water.

Step-by-Step Guide: How to Use the Aarke Carbonator 3
The Aarke Carbonator 3 is a sleek, easy-to-use device for carbonating water at home. Here’s a guide to help you get started with it.
1. Assemble the Carbonator
Begin by ensuring that the CO2 canister is properly installed in the machine. To do this, unscrew the cylinder cover at the back of the carbonator. Once the cover is removed, insert the CO2 canister into the opening and screw it in tightly by hand. After the canister is secured, reattach the back cover to the machine.
2. Fill the Water Bottle
Next, fill the included water bottle with cold water. Be careful to only fill it up to the fill line, which is marked on the bottle. It’s important not to overfill the bottle, as this could affect the carbonation process and lead to overflow during use.
3. Attach the Bottle
After filling the bottle, insert it into the carbonator. To attach it, gently screw the bottle into the carbonator nozzle at the top of the machine by twisting it clockwise until it is securely in place. Make sure the bottle is firmly attached, but avoid overtightening.
4. Carbonate the Water
Now you’re ready to carbonate your water. Push the lever down to start the carbonation process. You’ll need to hold the lever down until you hear a distinct buzzing sound, which signals that carbonation is happening. Once you hear the buzz, release the lever. If you prefer your water to be extra fizzy, you can press the lever multiple times to increase the carbonation level.
5. Remove the Bottle
Once the carbonation process is complete, carefully unscrew the bottle by twisting it counterclockwise. As you unscrew it, there may be a small release of pressure, so proceed slowly to avoid any splashing. The water inside is now fully carbonated and ready to enjoy.
6. Enjoy or Flavour the Carbonated Water
At this point, your water is carbonated and ready to drink. You can enjoy it plain, or you can add flavouring such as syrups, fresh fruit, or herbs to create a more personalised sparkling beverage.
7. Cleaning and Maintenance
To maintain your Aarke Carbonator 3, it’s important to regularly clean the water bottle with warm water and mild soap. While the carbonator itself doesn’t need frequent cleaning, wiping down the exterior occasionally can help keep it looking pristine.
For best results, always use cold water when carbonating, as it produces better fizz. Also, be sure to use only the bottle that comes with the machine, as third-party bottles might not be designed to handle the high pressure involved in the carbonation process.
Troubleshooting Common Issues
In our journey to mastering the Aarke Carbonator 3, we inevitably encounter some bumps along the way. These common issues, while frustrating, are often easily resolved with a bit of troubleshooting.
The Buzzing Sound
The buzzing sound you hear during the carbonation process is a crucial part of using your Aarke Carbonator 3. This sound is not just a random noise and it is not a problem; it's a signal that your water is being carbonated.
When you hold down the lever of your sparkling water maker, the CO2 gas is released into the water, creating those delightful bubbles. The buzzing sound is an indication that the carbonation process is complete.
You can repeat the process up to three times. However, remember to release the lever halfway after each buzz, before pushing it down again. This technique ensures that no extra CO2 is wasted in creating pressure between the carbonation cycles.
Dealing with Cylinder Issues
When it comes to the Aarke Carbonator 3, cylinder issues can be a common hiccup. However, don't fret, as these problems are usually straightforward to resolve.
Firstly, ensure that the cylinder installation is done correctly. A misaligned or improperly installed cylinder can lead to a myriad of issues. Always follow the manufacturer's instructions and safety guidelines during installation to avoid any mishaps.
If you're still encountering issues with the cylinder, it might be due to the bottle filling prep. Make sure the water level in the bottle is within the recommended range. Overfilling or underfilling can cause the cylinder to malfunction.
Addressing Carbonation Problems
When it comes to addressing carbonation problems with your Aarke Carbonator 3, there are a few common issues that you might encounter. One of the most common is a lack of bubbles in your water. This could be due to a number of factors, such as the temperature of the water or the pressure of the CO2 cylinder.
Firstly, ensure that you're using cold water for carbonation. As mentioned earlier, cold water achieves a better level of carbonation and stays bubbly for longer. If you're using room temperature or warm water, you might not get the desired level of carbonation.
Secondly, check the pressure of your CO2 cylinder. If the pressure is too low, it might not be able to carbonate your water properly. Make sure that the cylinder is properly installed and that there are no leaks. If you're unsure about how to do this, refer to the cylinder installation and bottle filling prep guide provided with your Aarke Carbonator 3.

Maintaining Your Aarke Carbonator 3
The Aarke Carbonator 3 is a fantastic addition to any kitchen, but like any appliance, it requires regular maintenance to keep it in top shape:
- Avoid Dishwashers: Never put your Aarke Carbonator 3 in the dishwasher. The high temperatures can damage the product components.
- Use Lukewarm Water: For cleaning, use lukewarm water and a soft cloth. Avoid using harsh cleaning agents as they can cause discolouration.
- Clean the Spill Tray Regularly: The spill tray should be cleaned regularly to prevent build-up. Simply remove it and wash with lukewarm water.
- Dry Thoroughly: After cleaning, ensure all parts are thoroughly dried before reassembling. This helps to prevent any potential damage from moisture.
Safety Guidelines to Follow
When it comes to using your Aarke Carbonator 3, safety is paramount.
- Never attempt to carbonate anything other than water in your Aarke Carbonator 3. Adding other liquids or substances can damage the product components and potentially cause harm.
- Always ensure that the spill tray is correctly positioned before use. This will catch any excess water that may overflow during the carbonation process, preventing potential slips or spills.
- If your Aarke Carbonator 3 requires cleaning, only use lukewarm water and a soft cloth. Avoid using harsh chemicals or abrasive cleaning tools as these can damage the machine.
By following these safety guidelines, you can enjoy your Aarke Carbonator 3 with peace of mind.
Embrace the Sparkle with Aarke Carbonator 3
The Aarke Carbonator 3 is a fantastic investment for those who love sparkling water. With its stainless steel design and easy-to-use functionality, it's a game-changer in the world of home carbonation.
By following the steps outlined in this guide, you can easily set up your machine, understand the buzzing sound, and master the carbonation process. Remember, the key to perfect carbonation is to release the lever slowly and use cold water for better results.
With a bit of practice, you'll be creating your own bubbly water in no time. So, why wait?
Embrace the sparkle and transform your plain water into a refreshing, fizzy delight with the Aarke Carbonator 3. Sign up to CO2 YOU to receive your 2- or 4-pack Aarke CO2 canisters on your doorstep.


